Posted on

PACKAGE TEMPLATE LAYOUT FOR PRINT A COMPREHENSIVE GUIDE

Package Template Layout for Print

Mastering the Art of Package Template Layout for Print A Comprehensive Guide

Introduction

In the realm of print design, creating an impeccable box template is an art that requires precision, attention to detail, and a profound understanding of spatial relationships. Whether you’re crafting packaging for a product or preparing gift boxes, a well-structured box template ensures that your design translates seamlessly from the digital realm to the physical world. This article dives deep into the nuances of box template layout for print, equipping you with the knowledge to produce outstanding results.

1. Understanding the Anatomy of a Package Template

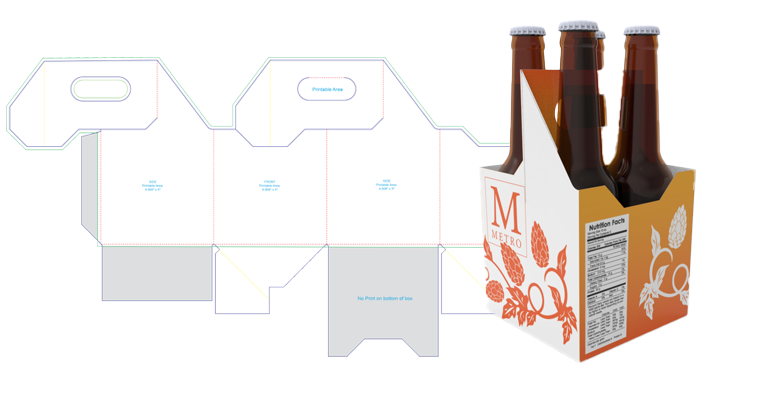
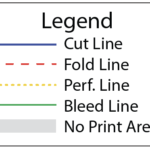
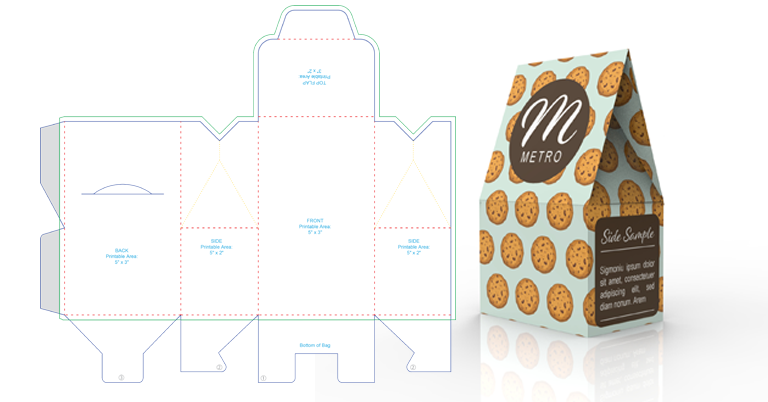
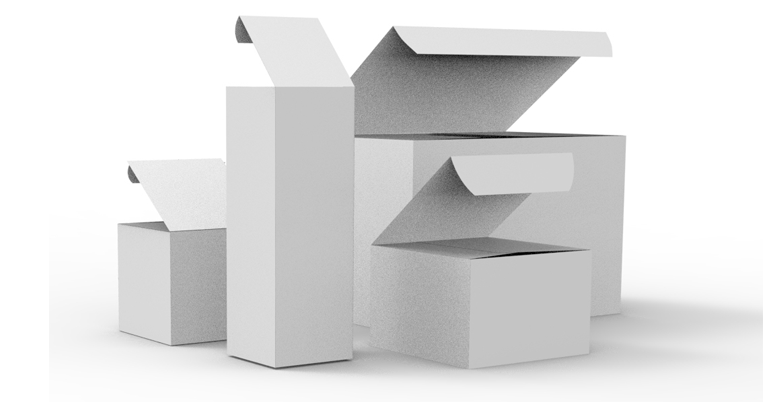
Before you begin, it’s vital to familiarize yourself with the various components that constitute a package template. A typical box template consists of several parts:

  • Front Panel: This is the visible face of the box and serves as the primary canvas for your design.
  • Side Panels: These panels connect to the front panel and contribute to the overall structure of the box.
  • Back Panel: This forms the back of the box and is often a continuation of the front panel’s design.
  • Flaps: These are the tabs that fold and interlock to create the box’s structure. They vary in size and shape depending on the type of box you’re creating.
  • Glue Areas: These are the designated sections where adhesive will be applied to secure the box during assembly.
  • Bleed and Trim Lines: Bleed lines indicate the area that extends beyond the final dimensions of the box, ensuring that no white edges are left after cutting. Trim lines indicate where the box will be cut to its final size.

2. Choosing the Right Software

Effective package template design requires software that can handle precise measurements and vector graphics. Adobe Illustrator and other vector-based software are popular choices due to their accuracy and flexibility in handling geometric shapes.

3. Sizing and Scaling

Begin by determining the dimensions of your box. Consider the product’s size and shape, as well as any additional space needed for packaging materials. Remember to account for the thickness of the material the box will be made from.

4. Designing the Template

  • Create Guides: Set up guides to mark the positions of the panels, flaps, and fold lines. This ensures that your design aligns perfectly with the box’s structure.
  • Utilize Layers: Organize your design using layers. This makes it easier to manage different elements and prevents confusion during the printing process.
  • High-Resolution Graphics: Use high-resolution images and graphics to ensure a crisp and clear output.
  • Branding and Information: Strategically place your branding, product information, and any required legal text on the box. Maintain a balance between aesthetics and necessary content.

5. Handling Typography and Imagery

  • Typography: Pay attention to font sizes and readability. Avoid placing important text or logos near fold lines where they might be obscured during assembly.
  • Imagery: Distribute images across panels carefully. Ensure that key visuals are not disrupted by seams or folds.

6. Test Prints and Prototypes

Before sending your design for mass production, create a few test prints and assemble prototypes. This step helps you identify any errors in the layout and make necessary adjustments.

7. Exporting for Print

When exporting the final design, save it in a format that preserves vectors, such as PDF. Make sure to include bleed and trim marks, and confirm with your print service provider about their preferred file specifications.

CONCLUSION

Designing a package template for print is a blend of creativity and precision. A well-executed template can enhance the visual appeal of your product, making it stand out on the shelves. By understanding the anatomy of a box, using appropriate software, and adhering to best practices, you can create box templates that seamlessly translate your design vision into the physical world. So, whether you’re a graphic designer or a business owner, mastering the art of box template layout will undoubtedly elevate your print design endeavors to new heights.
Posted on

4 PACK BOTTLE CARRIER LAYOUT INSTRUCTIONS

4 Pack Bottle Carrier Layout

Setting Up Your 4 Pack Bottle Carrier Layout

In this video tutorial we will guide you through the process of laying out your custom 4 pack bottle carrier using Metro Package Printing’s pre-made template.

1) Locate the 4 pack bottle carrier product page and download the template.
2) Unzip and open the pdf file in your editing software. (we are using Adobe Illustrator)

3) Each Metro Package Printing template has a Legend which describes the different guide lines.

2x2x2 Tuck Box Layout Legend

4) If using Illustrator to edit your pdf template you will also have layers designated for each part of the template.

TemplateLayers Illustrator

5) Import your design elements and begin aligning with the template.

6) If any part of your design is meant to bleed outside of the cut-line make sure that it extends to the bleed line.

7) Once your design looks good save the pdf, return to the corresponding product page, select qty and any other specifications you would like and add to cart.

8) Open your shopping cart to view your order. If everything looks good hit the check out button, upload your artwork and follow the check out process.

Posted on

3X2X5 TENT BOX LAYOUT INSTRUCTIONS

3X2X5 TENT BOX LAYOUT

Setting Up Your 3X2X5 Tent Box Layout

In this video tutorial we will guide you through the process of laying out your custom 3x2x5 tent box using Metro Package Printing’s pre-made template.

1) Locate the 3x2x5 Tent Box product page and download the template.
2) Unzip and open the pdf file in your editing software. (we are using Adobe Illustrator)

3) Each Metro Package Printing template has a Legend which describes the different guide lines.

2x2x2 Tuck Box Layout Legend

4) If using Illustrator to edit your pdf template you will also have layers designated for each part of the template.

TemplateLayers Illustrator

5) Import your design elements and begin aligning with the template.

6) If any part of your design is meant to bleed outside of the cut-line make sure that it extends to the bleed line.

7) Once your design looks good save the pdf, return to the corresponding product page, select qty and any other specifications you would like and add to cart.

8) Open your shopping cart to view your order. If everything looks good hit the check out button, upload your artwork and follow the check out process.

Posted on

2X2X2 TUCK BOX LAYOUT INSTRUCTIONS

2x2x2-TUCK BOX LAYOUT

Setting Up Your 2X2X2 Tuck Box Layout

In this video tutorial we will guide you through the process of laying out your custom 2x2x2 tuck box using Metro Package Printing’s pre-made template.

1) Locate the 2x2x2 Tuck Box product page and download the template.
2) Unzip and open the pdf file in your editing software. (we are using Adobe Illustrator)

3) Each Metro Package Printing template has a Legend which describes the different guide lines.

2x2x2 Tuck Box Layout Legend

4) If using Illustrator to edit your pdf template you will also have layers designated for each part of the template.

TemplateLayers Illustrator

5) Import your design elements and begin aligning with the template.

6) If any part of your design is meant to bleed outside of the cut-line make sure that it extends to the bleed line.

7) Once your design looks good save the pdf, return to the corresponding product page, select qty and any other specifications you would like and add to cart.

8) Open your shopping cart to view your order. If everything looks good hit the check out button, upload your artwork and follow the check out process.